


Introduction
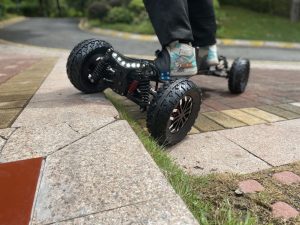
Electric skateboards have exploded in popularity in recent years. Their electric motors allow you to zip around town with less pushing effort compared to traditional skateboards. Many pre-built electric skateboard models are now available from various brands like Ecomobl. However, opting to build your own DIY e-skate opens up exciting possibilities.
Constructing an electric skateboard yourself enables full customization based on your specific performance preferences, riding style, and budget. You can hand-pick high-quality components to create your ideal electric skateboard tailored to your goals. By the end, you’ll have the knowledge and hands-on experience to construct your own high-performance electric skateboard from the ground up. Let’s get started!
Why Build Your Own Electric Skateboard?
Before diving into the DIY process, you need to some of the major benefits of building your own e-skate:
Customization: You can choose the exact components you want and configure them to match your riding style and performance needs.
Cost Savings: DIY electric skateboards can be built for half the price or less compared to commercial versions with similar specs.
Gaining Valuable Knowledge:The DIY process imparts first-hand knowledge about how electric skateboards work. You will gain technical know-how related to electronics, motors, batteries, and mechanics. This hands-on experience allows you to intimately understand your board’s inner workings compared to buying a ready-made black box.
Planning Your Electric Skateboard
Careful planning is crucial to define your design goals, riding style, and budget to help guide optimal component selection.
Identify Your Riding Style and Objectives: Consider factors like desired speed and range, terrain, maneuverability needs, portability requirements, and whether special features are wanted.
Set Your Budget: Establish a realistic budget that will guide choices of affordable component options. High-performance builds with top parts exceed $1000, but functional boards can be made for $300-$500 selecting cheaper new parts or used components.
After understanding DIY e-skate benefits and planning carefully, you are now ready to start the step-by-step build process!
Step 1: Gather the Necessary Components
First, you’ll need to purchase the core components of your electric skateboard build:
Skateboard Deck: Select a high-quality deck that provides adequate stiffness while still allowing some flex for a smooth ride. The deck size and shape should match your height and stance preferences.
Electric Motor: Look for a brushless DC motor in the 500-3000W power range. Higher wattage means more torque and hill-climbing ability. Make sure the motor size allows mounting on your deck.
Motor Controller: The controller regulates power from the battery to the motor. Opt for a compatible, programmable controller that provides smooth acceleration and braking control.
Battery Pack: Lithium-ion packs provide the best combination of energy density and power. Calculate your required battery capacity based on factors like range, motor power, and weight.
Remote Control: A handheld remote allows you to easily control your board’s speed and braking. Look for a remote with adjustable acceleration and braking curves.
Drive System: You’ll need a belt drive or gear drive system to transfer power from the motor to the wheels. Consider noise and efficiency levels.
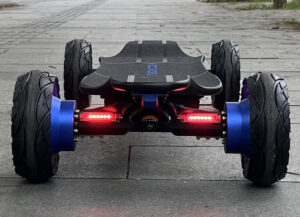
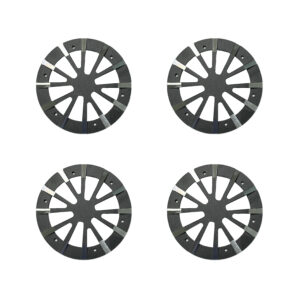
Wheels and Trucks: Choose longboard wheels and trucks suitable for your deck size that provide adequate stability at higher speeds.
Step 2: Prepare the Deck
Once you have all the components, it’s time to get the deck ready for installation. Follow these tips:
- If your deck has grip tape applied, you’ll need to remove it to clearly access the surface for mounting hardware. Use a heat gun to soften the adhesive before slowly peeling it off.
- Use a ruler and pencil to carefully measure and mark the locations where you’ll drill holes for attaching the enclosures and motor mount. Double-check measurements before drilling.
- For a clean installation, drill holes perpendicular to the deck using a power drill with the appropriate-sized drill bit. De-burr holes after drilling.
- Clean the deck thoroughly with a degreaser to remove any dirt or oil before installation. Allow it to completely dry.
- Place a strip of grip tape along the edges to prevent scuffing where the enclosures will attach.
Taking the time to prep the deck properly will allow for a smooth installation of components down the line.
Step 3: Install the Motor and Drive System
Now it’s time for the mechanical aspects – attaching the motor and connecting it to the wheels:
- Mount the motor mount or bracket to your rear truck using the supplied hardware. Position it so the motor will align with the wheel pulley.
- Carefully insert the truck assembly through the rear of the deck and securely fasten it with the kingpin nut.
- Attach the motor to the motor mount using screws, washers, and a loctite thread locker. Ensure a tight, vibration-proof fit.
- Slide the drive wheel pulley onto the motor shaft and tighten its set screw. Make sure the pulley is perfectly aligned.
- Install the driven wheel pulley onto the wheels and use bushings or shims so it fits snugly with no wobble.
- Run the belt over the two pulleys and tension it appropriately so it does not slip. The ideal tension allows 1/2″ deflection when pressed.
- Check that the belt is properly seated in the pulley grooves. Give the wheel a spin to confirm the smooth operation.
Getting the drive system professionally aligned takes some mechanical aptitude. Take your time to do it right for a safe build.
Step 4: Install the Electronics
The electronics bring your e-skateboard to life. Follow good wiring practices for a safe, high-performance build:
- Mount the motor controller inside a protective enclosure secured to the bottom of the deck. Use standoffs to raise it off the surface.
- Similarly, attach the battery enclosure to the underside of the deck if it did not come pre-installed.
- Connect the battery to the motor controller according to the wiring diagram. Pay close attention to positive and negative terminals.
- Attach the battery indicator display, on/off switch, and charging port in accessible positions on the enclosures.
- Plug in the motor wires and remote receiver to the controller board’s mating connectors.
- Neatly route and secure all wiring so it does not interfere with the drive components or wheels.
- Cover connections with heat shrink tubing or electrical tape to prevent short circuits.
Pay meticulous attention to instructions and wire colors when making electronic connections. Faulty wiring can irreparably damage components.
Step 5: Testing and Adjustments
With assembly complete, it’s time to configure your electronics and test the board:
- Fully charge the batteries prior to first use for proper current balancing. This may take several hours.
- Turn on the board and sync the remote based on the provided pairing instructions.
- Adjust the motor controller settings conservatively for the initial test runs.
- Verify the remote is controlling the board as expected – acceleration, braking, turning, etc.
- Carefully run through the full speed range on a flat, open surface to observe performance.
- If the belt slips or has excessive vibration, re-tension or realign it as needed.
- Confirm that no wires or components have worked loose during testing.
- Recharge the batteries and make incremental configuration tweaks to tune the board to your liking.
Always wear safety gear and test in a safe environment. Take it slow during initial testing until you are comfortable with the power and handling.

Conclusion
With diligence following these steps, you’ll achieve the incredibly rewarding experience of designing, building, and riding an electric skateboard crafted completely by your own hands. Customize, learn, and most importantly, have fun on your unique DIY eboard!
Read More
- Expert Guide For Choosing An Electric Longboard Skateboard In 2023 – Ecomobl
- Fix Electric Skateboard Cannot Charge – Ecomobl
- Electric Skateboard Range – Ecomobl
- Electric Skateboard Battery Lifespan – Ecomobl
- Fukushima Water Release Pacific – Ecomobl

